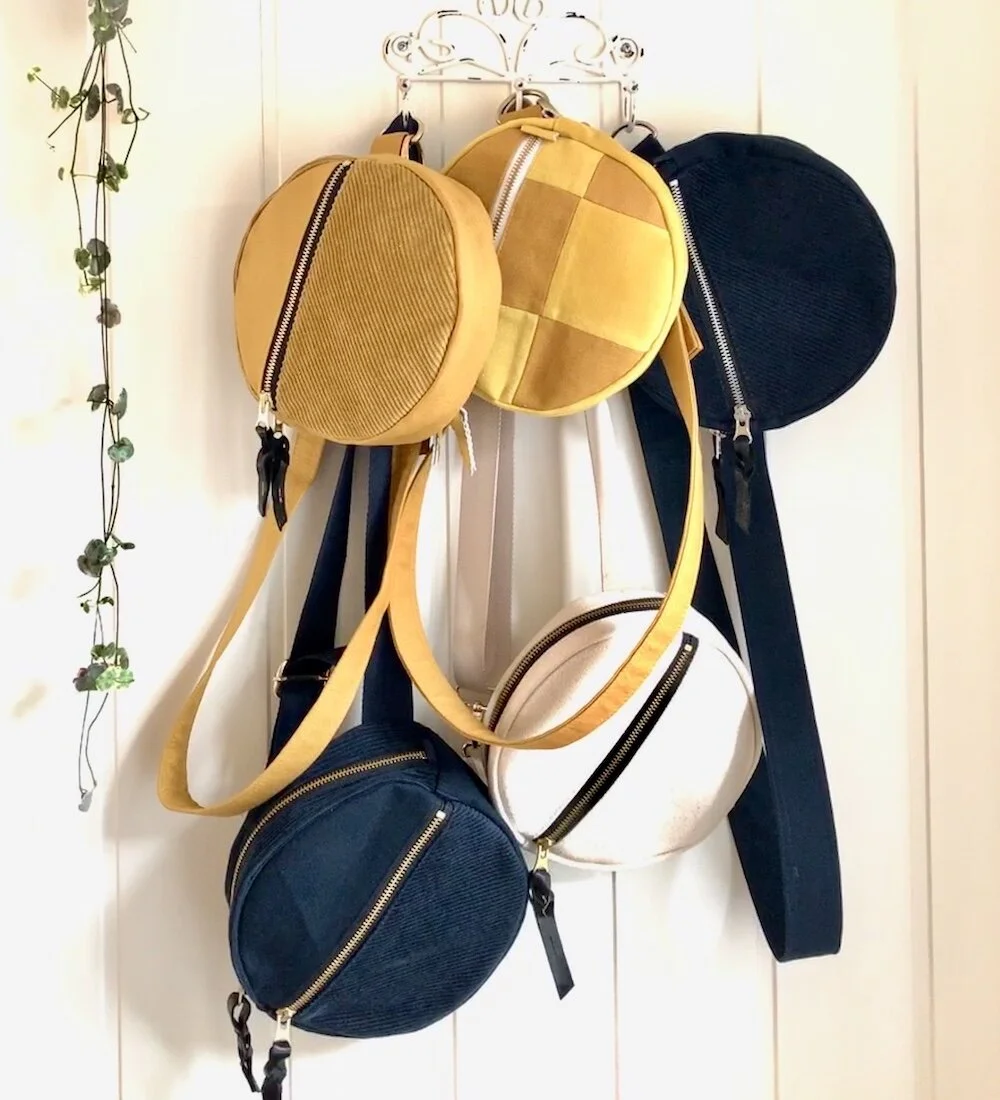
Circle fanny pack / Step by step tutorial

Hello there and welcome! This is a relatively easy project that you can accomplish in a couple of hours. The bag has 6 pattern pieces: 4 circles and 2 rectangle panels that you cut out of your fabric.
Materials needed:
Fabric requirements are based on 140 cm (55”) wide fabric.
Heavy weight canvas: 25 cm (10”) that you have to cut into following pieces:
heavy weight canvas: Cut 4 circles: each 21,5cm (8 1/2”) diameter, (use a pair of compasses or a kitchen plate)
heavy weight canvas: top and bottom panels : Cut 2 panels: 28cm (11”) and 43cm (17”) long, both 7cm (2 3/4”) width. (The top panel is shorter, and the bottom panel is longer.) I usually cut the bottom panel a bit longer than needed and cut the excesses of fabric after attaching it to the front panel.
Notions you need to have:
zipper 18cm (7”) for the front panel
zipper 25cm (10”) for the top panel
belt/webbing max.120cm length (47”)
one lobster clasp, one D-ring and one slide adjuster, all same width as your belt!
optional: two stripes of leather approx. 15cm (6”) each (for the zippers)
bias tape
zipper presser foot
Needle no. 80 – 90 (Jeans/denim)
matching thread and a sewing machine
rotary cutter and cutting mat
ruler
scissors
lighter or matches
Instructions
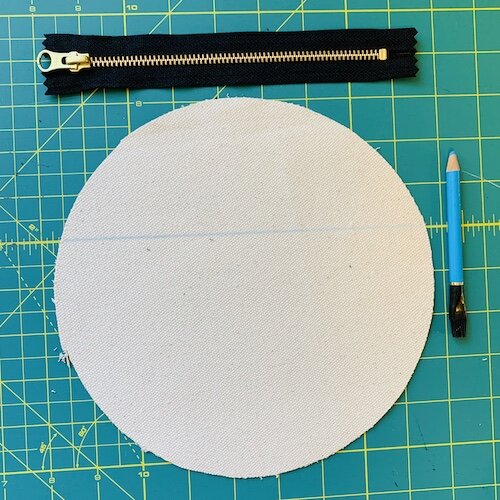
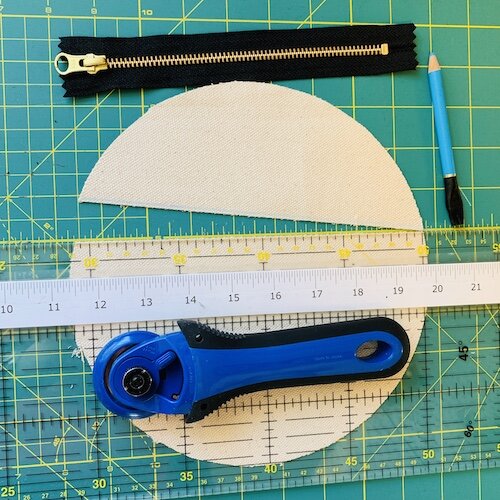
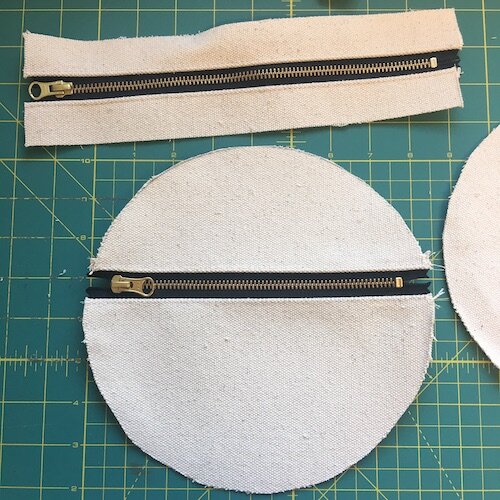
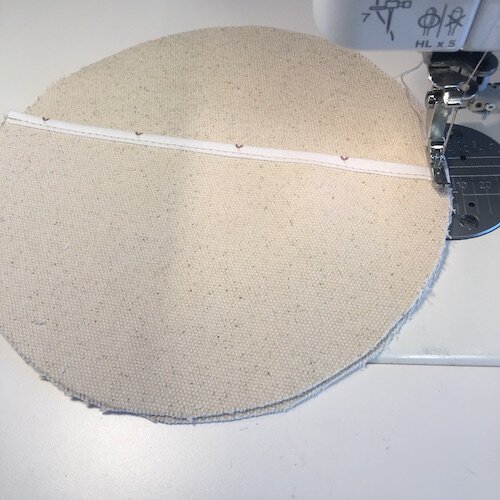
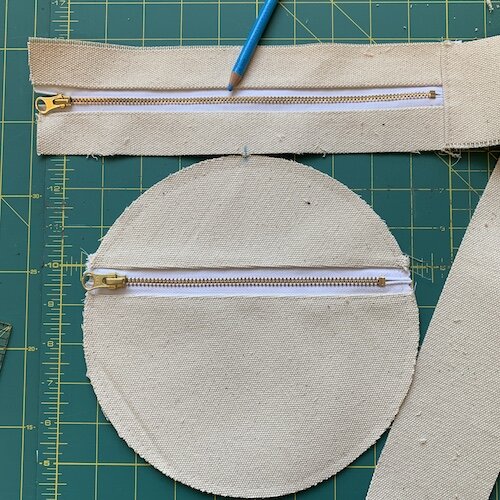
Measure 8cm (3 1/8”) from the top of one circle and draw a line.
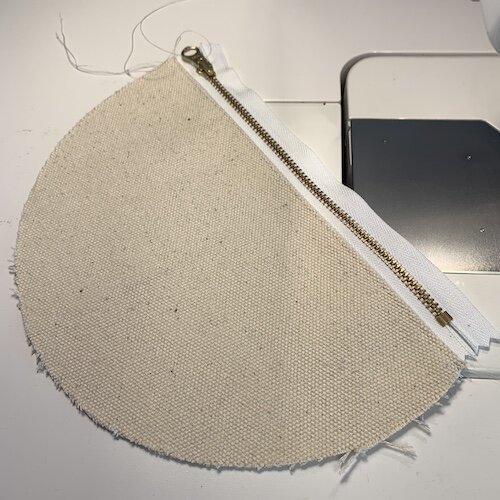
Place the zipper on the front panel to form the pocket. It must be minimum 1 cm (3/8”) from the zipper teeth to the circle edge.
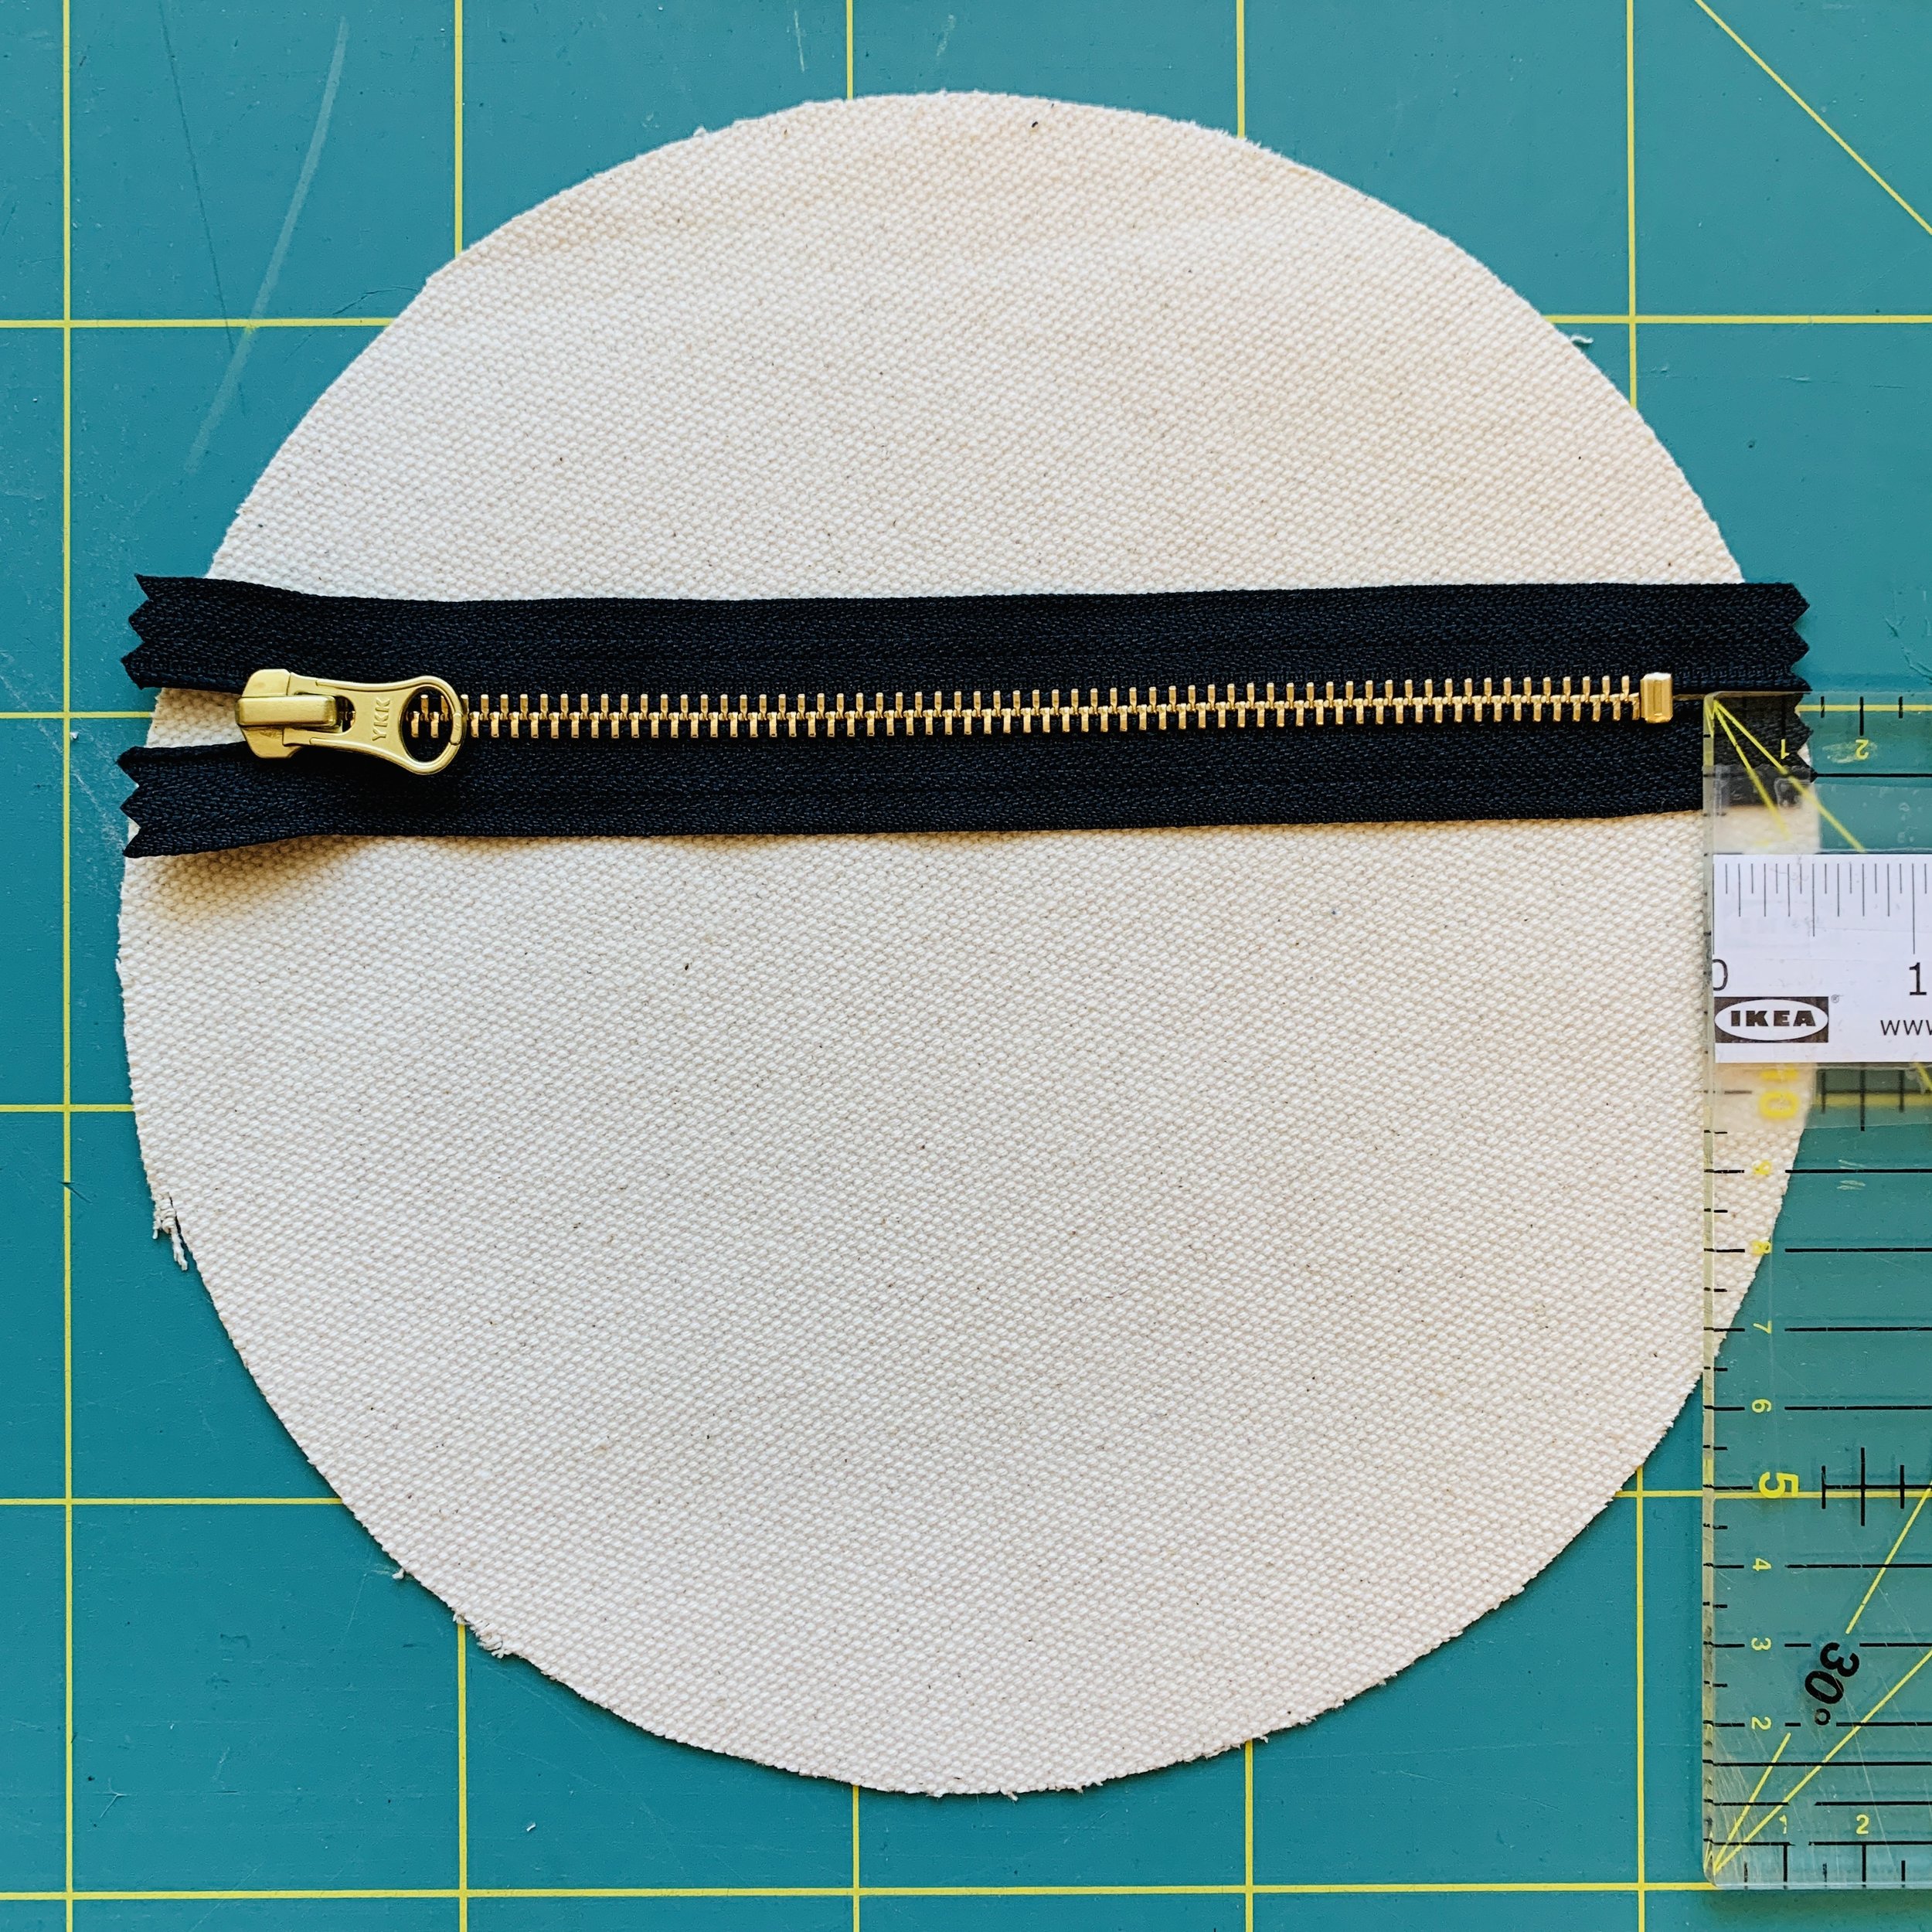
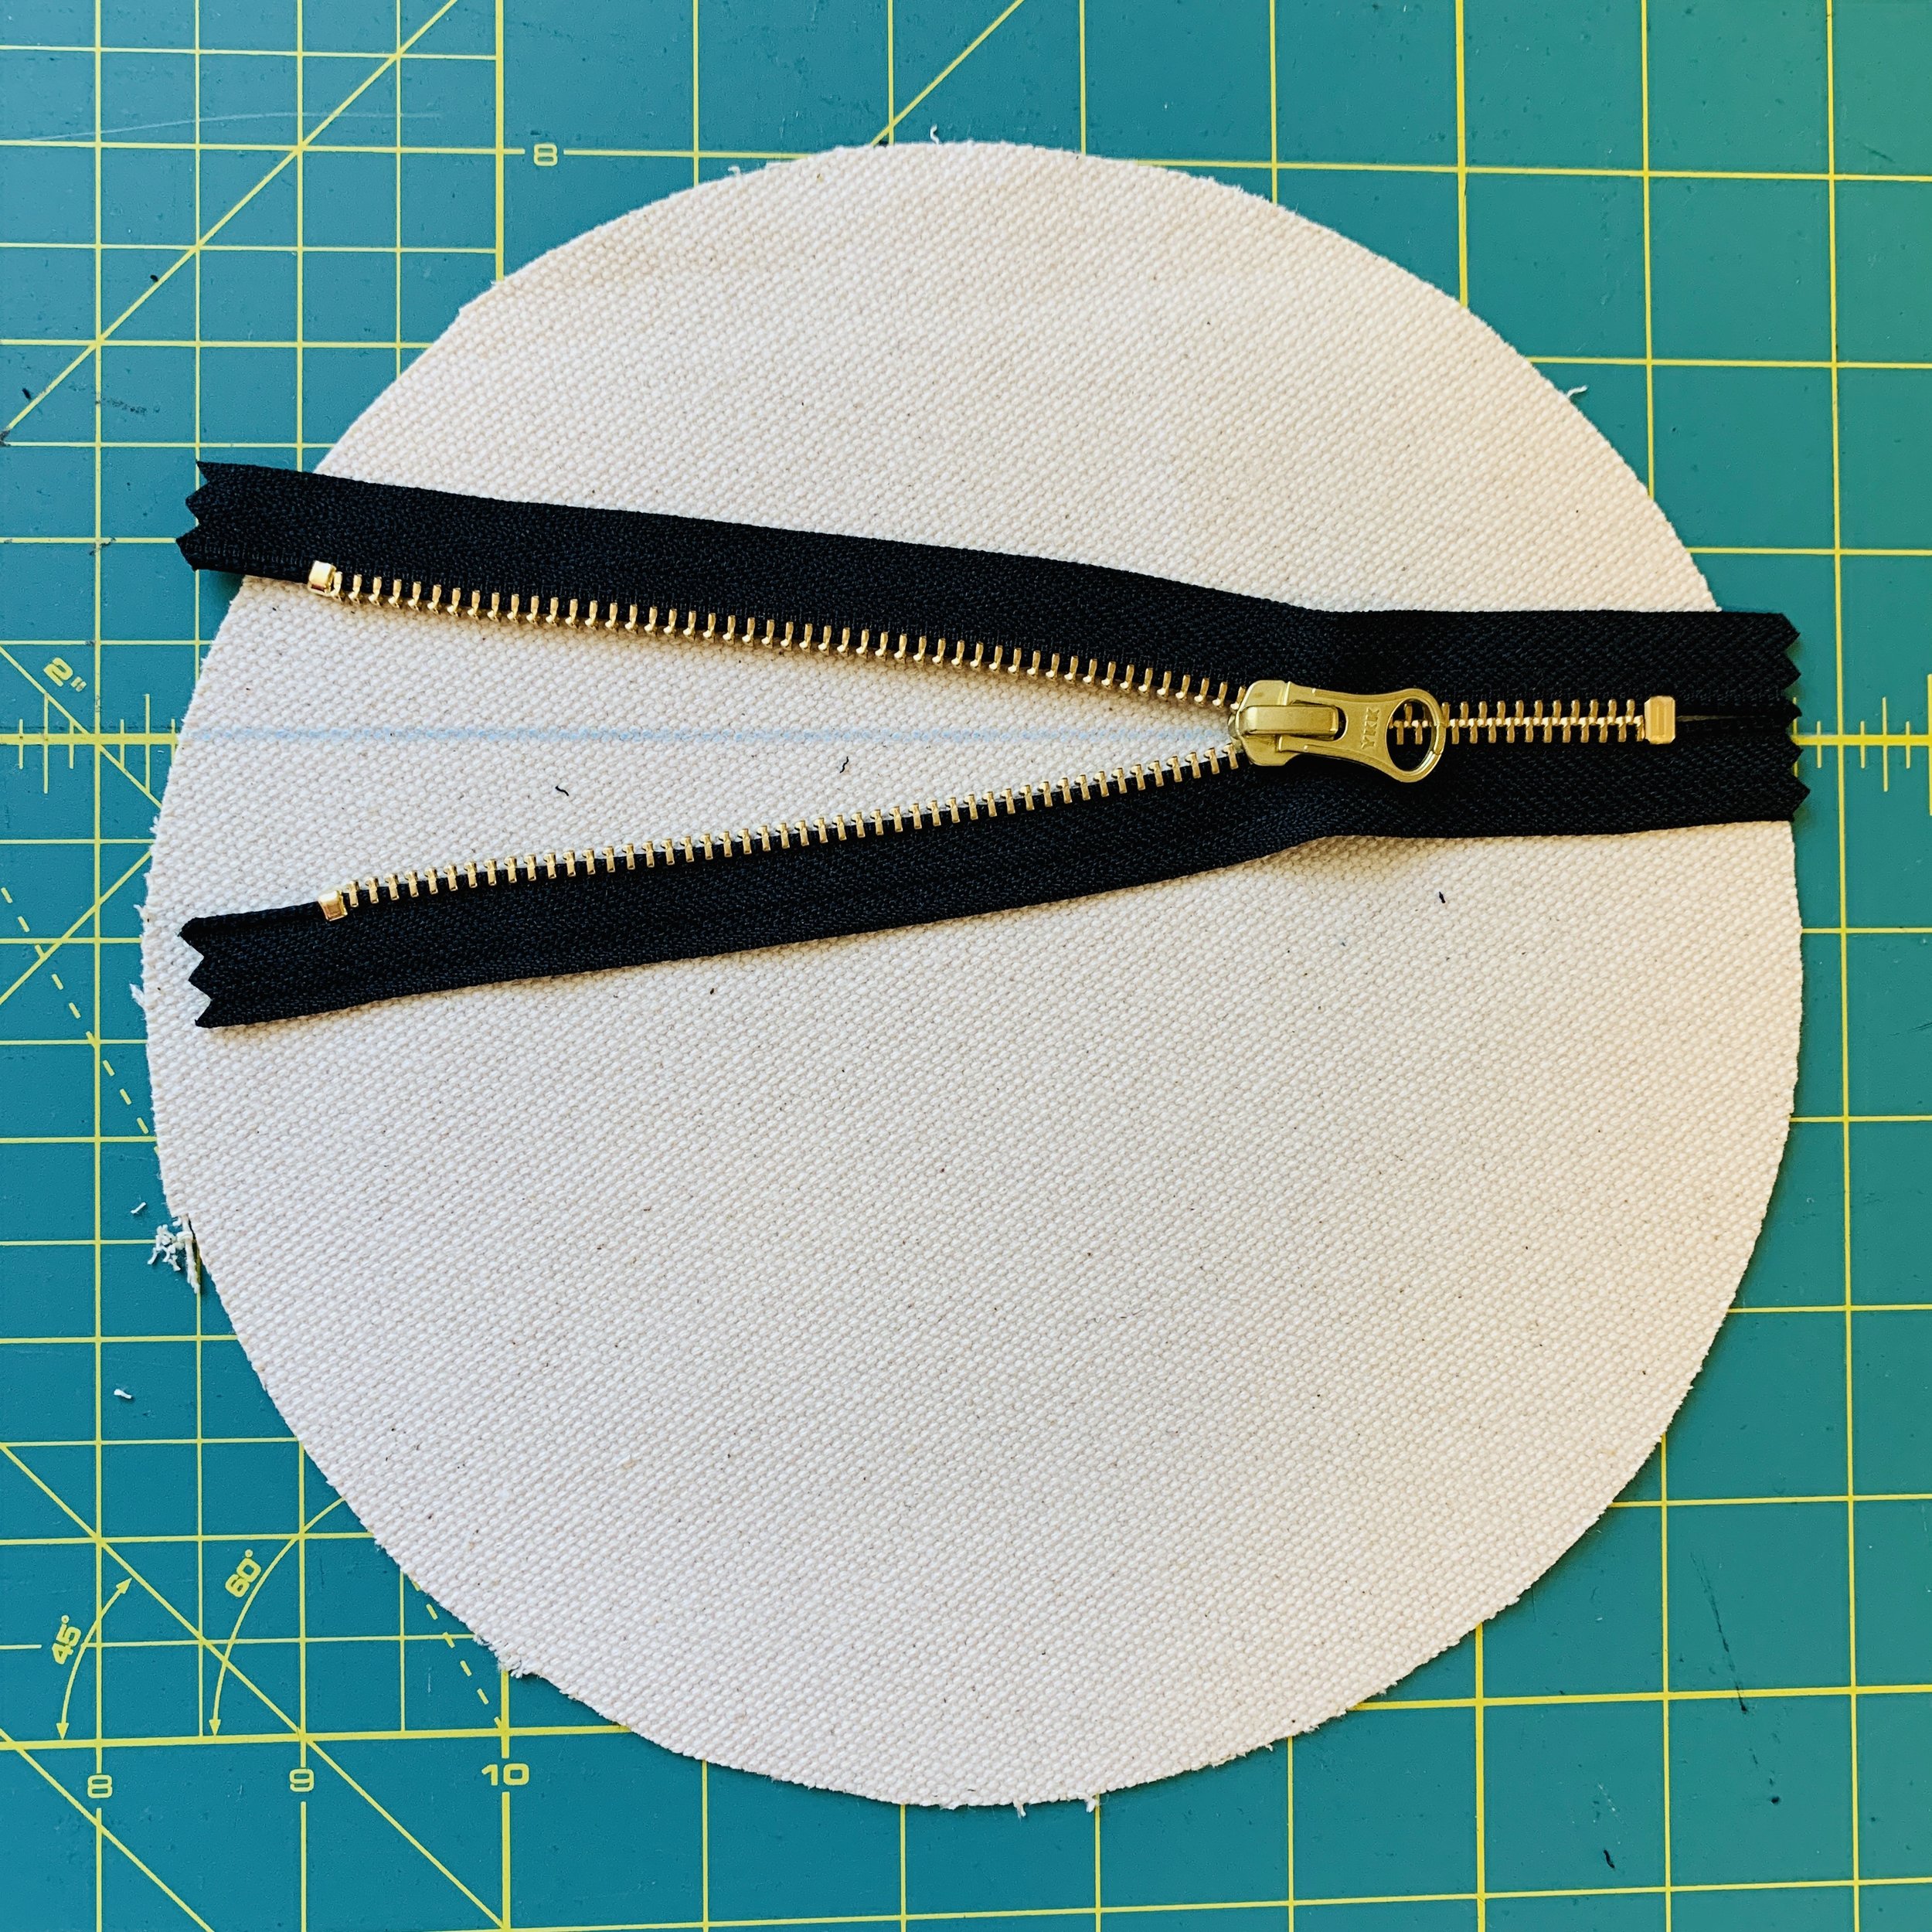
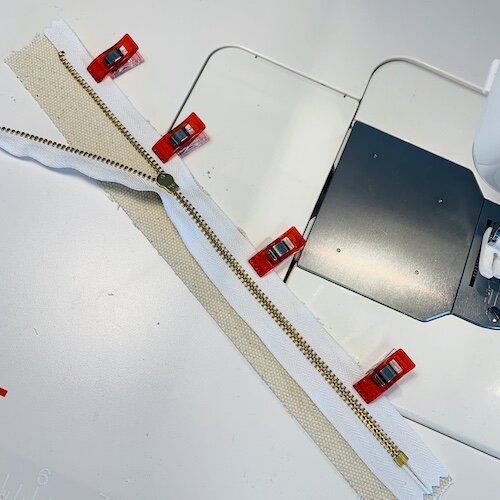
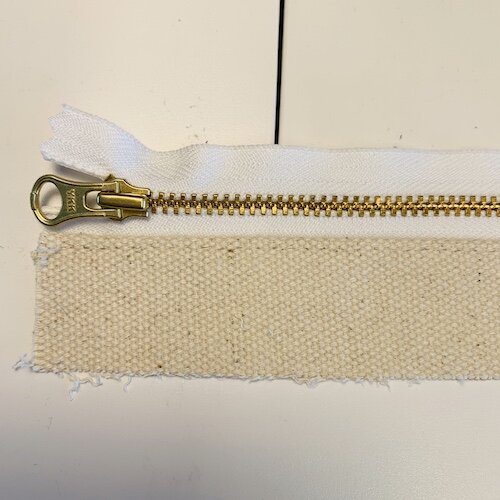
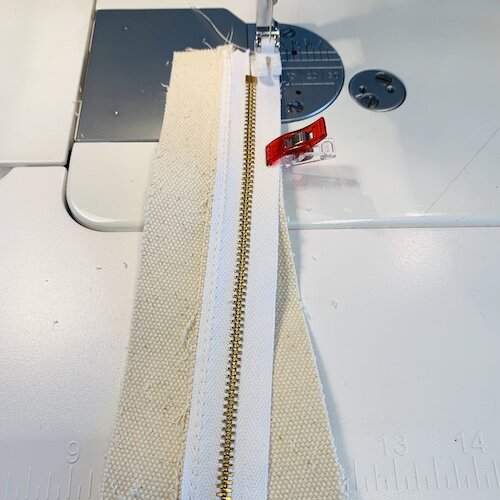
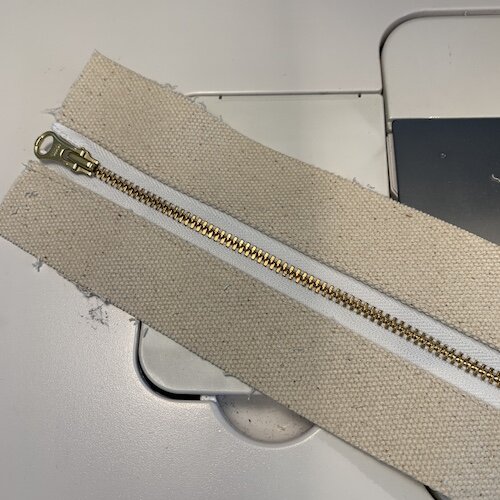
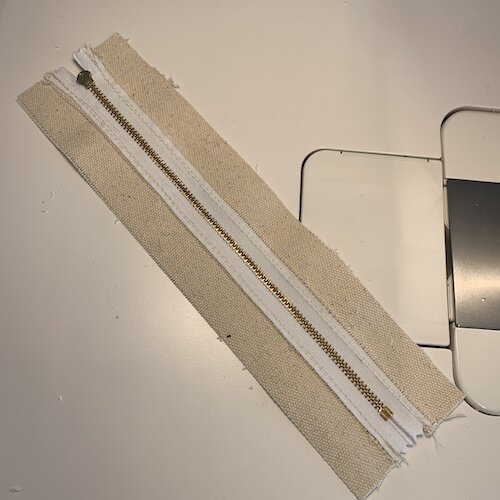
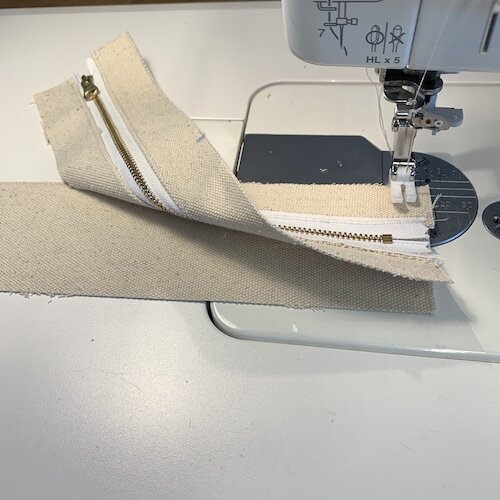
Cut the front panel in 2 pieces as it shown in the picture and prepare to install the 18cm (7”) zipper.
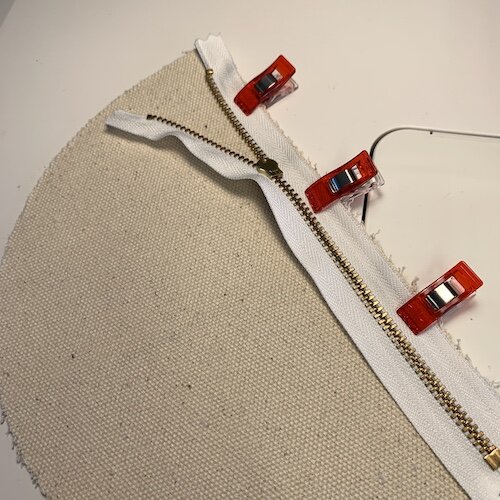
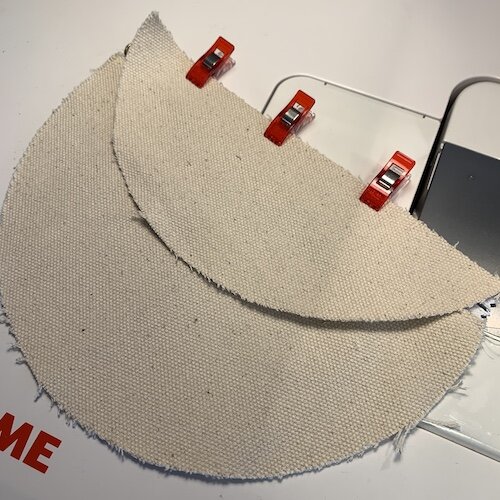
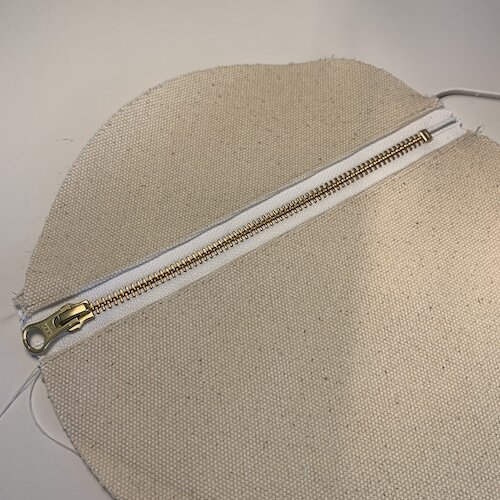
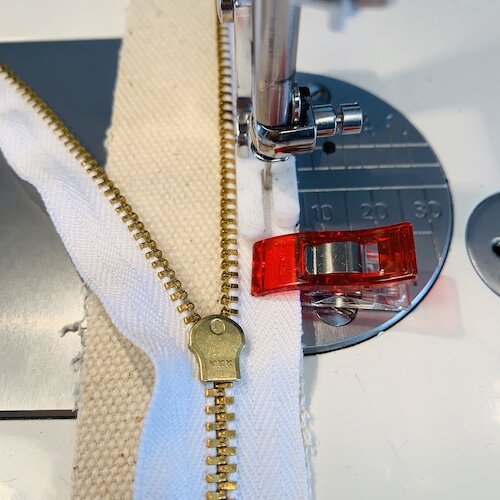
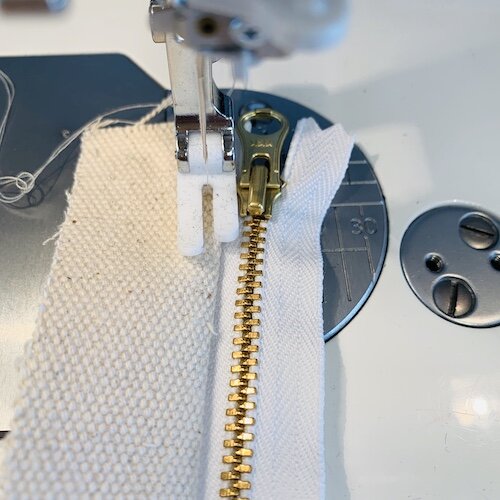
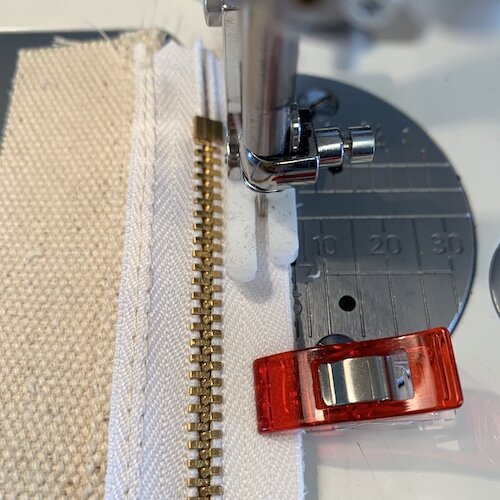
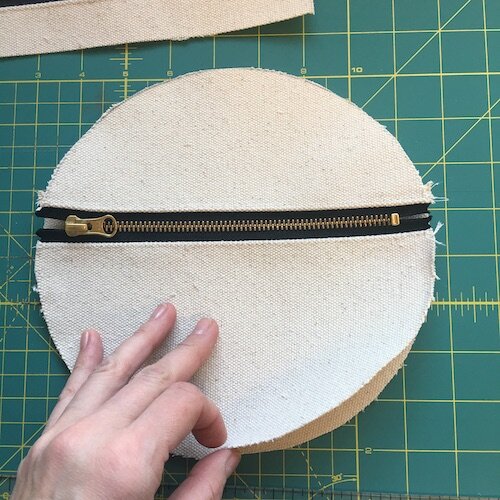
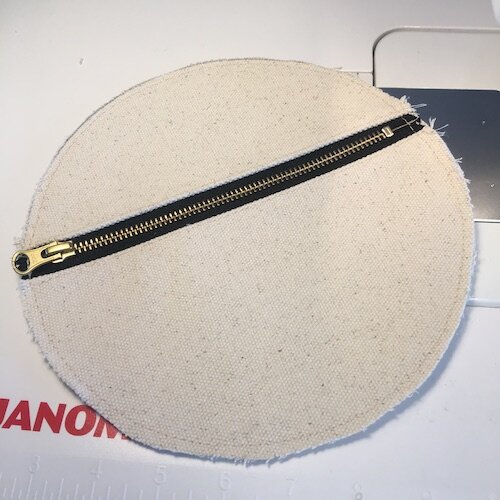
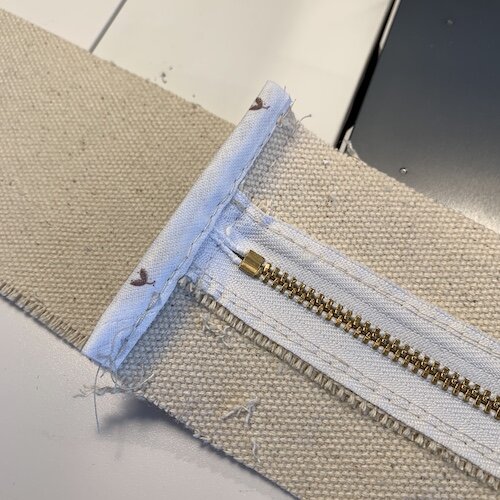
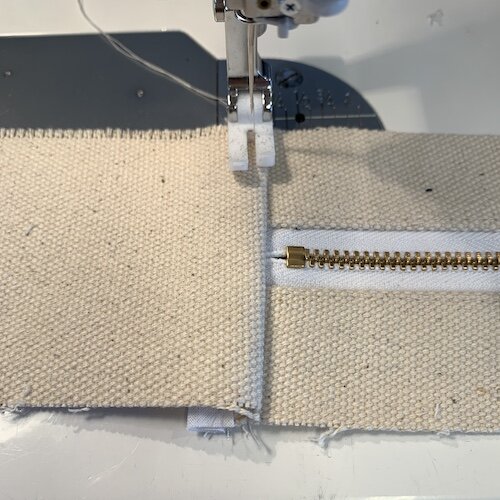
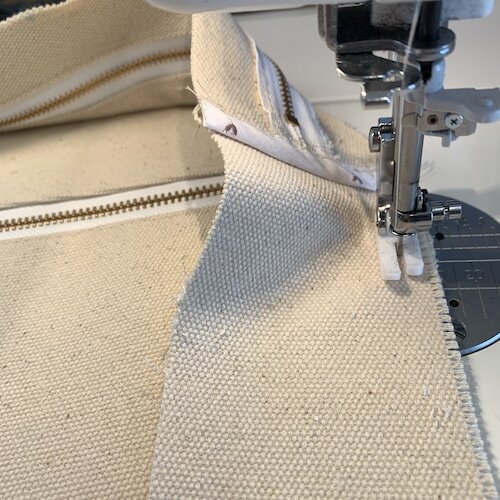
Align the edges, pin to hold in place and install the zipper. Stitch close to the edge, approx.4 mm from the edge. Use a zipper foot or narrow foot on your sewing machine. You can cover the raw edge with bias tape. Topstitch on the right side using 3 mm (1/16”) seam allowance.
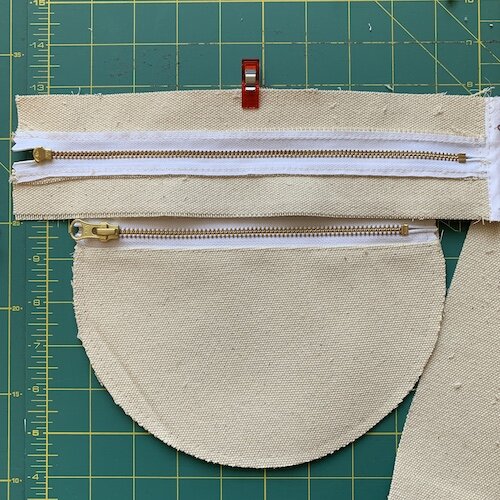
Make sure to backstitch at beginning and end of each seam to secure the stitches. Do the same with the other part of the front panel as shown in the pictures below.
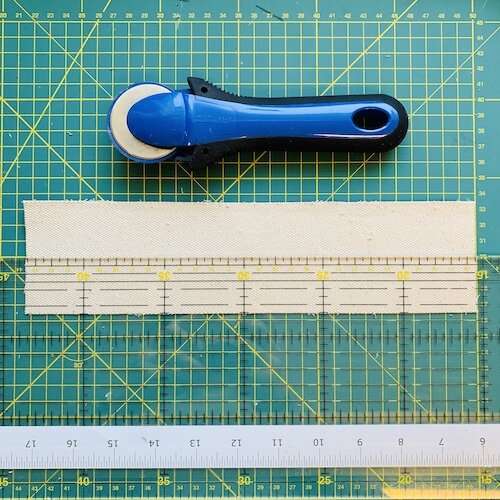
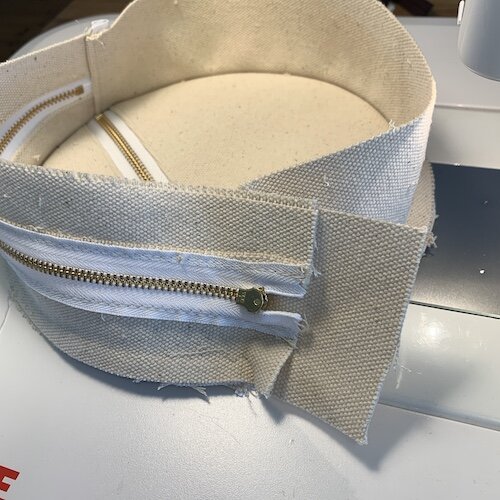
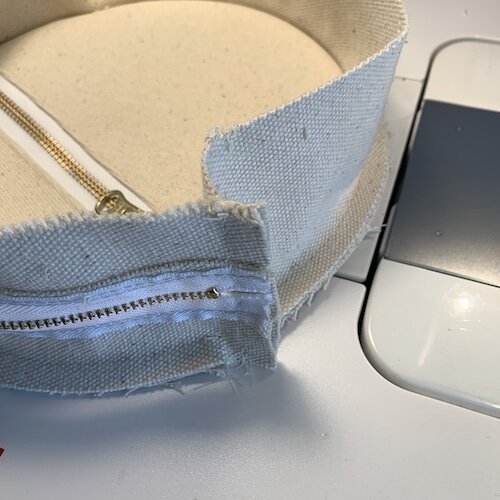
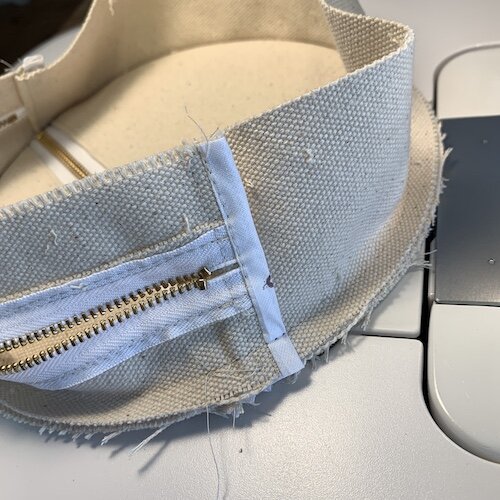
Cut the top panel in half.

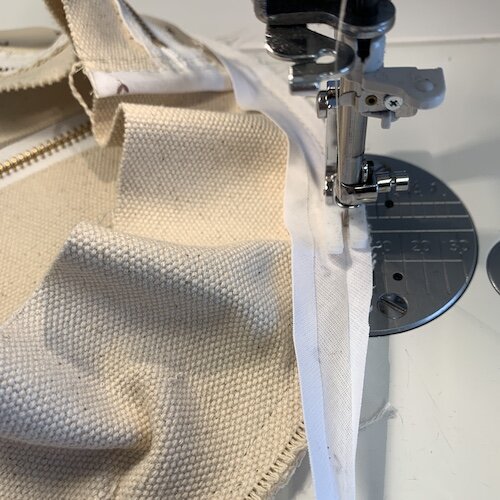
Stitch 25cm(10”) zipper to one half of the top panel. You might need the zipper foot on your sewing machine. (You can cover the raw edge with bias tape if you will, it is not shown in the picture). Turn the zipper right side up and topstitch using 5 mm (3/16”) seam allowance.
Stitch another half of the panel to the zipper, topstitch using 3 mm (1/8”) seam allowance.
Now you have the top and the front panels done! After that you can switch back to the regular foot on your sewing machine.
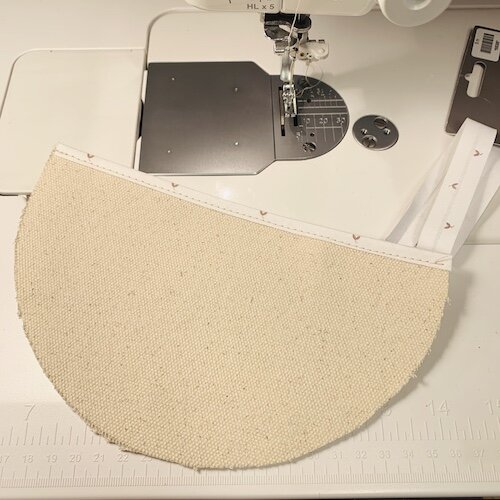
Stitch/baste (close to the edge) the front panel to another circle canvas piece forming a front pocket. Your front panel with a pocket is ready.
Make an inside pocket: mark 9 cm (3 1/2”) from the top of the circle panel and cut. Cover the horizontal edge with bias tape. Edgestitch the pocket panel and the back panel together. This will be the back panel with a pocket inside.
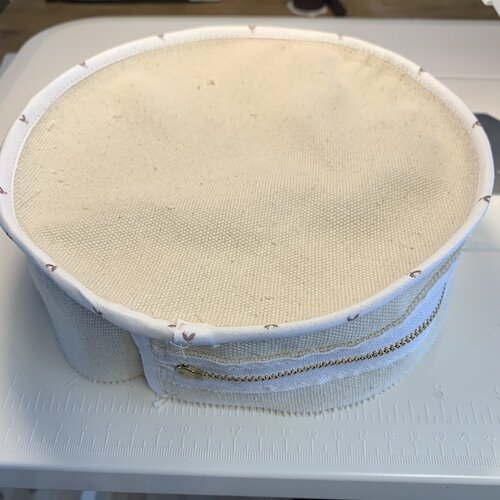
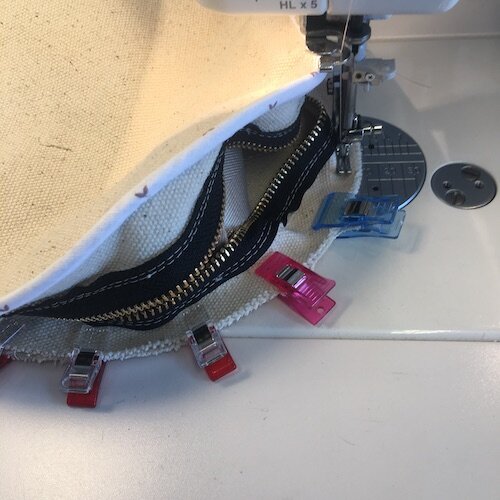
Sew top and bottom panels together on one side. Stitch bias tape on the raw edge. Use matching thread with your bias tape. Topstitch using 3 mm (1/8”) seam allowance.
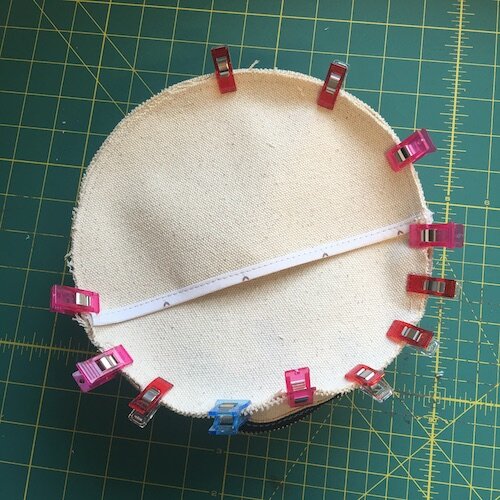
Now, mark the middle of the top panel and the front panel with a pen. (To find center: finger-press in half and mark within seam allowance.) Pin it.
Sew the top panel and the bottom panel to the front circle panel using approx. 7 mm (1/4”). Cut the excesses of bottom panel. Use bias tape on the raw edge.
Cover the inside raw edges with a bias tape.
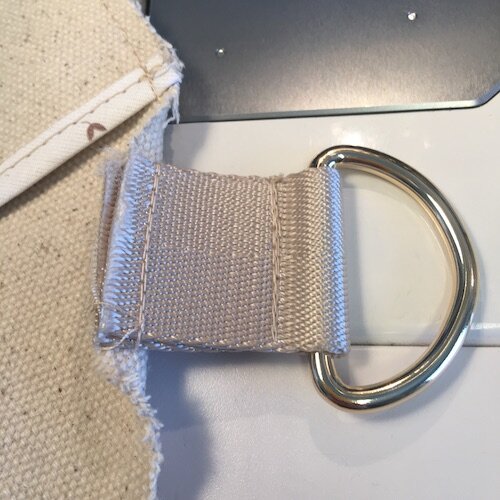
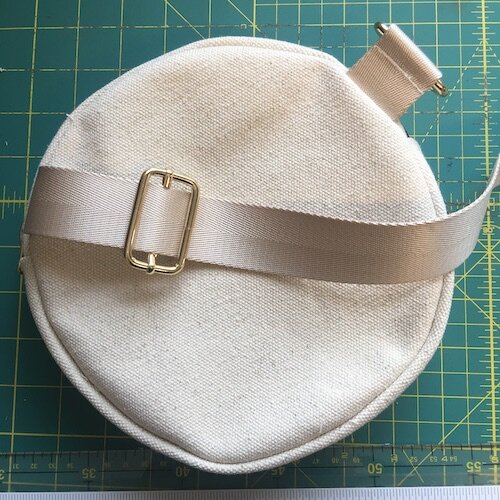
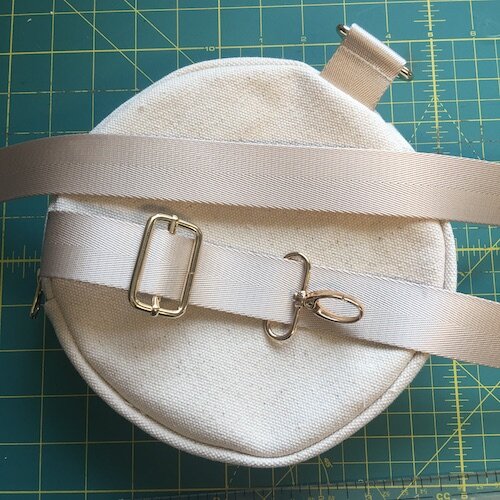
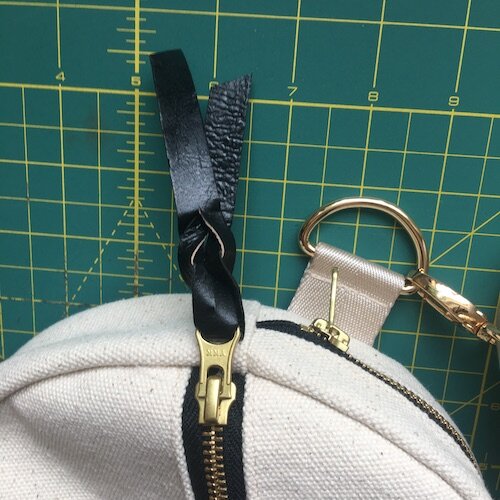
Make a loop with a D-ring. Set in belt as shown in the picture and stitch to the back panel.
Use lighter to melt the raw edges of the webbing! (it is not shown in the picture).
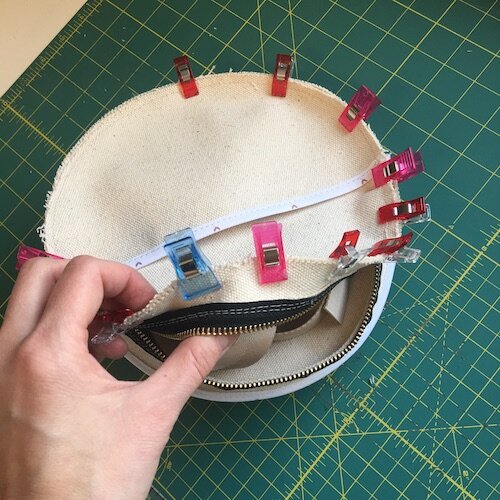
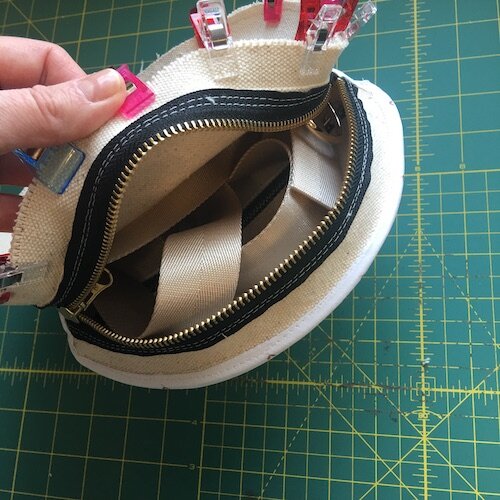
Now unzip your top panel!
Set in the back panel leaving the belt inside. Sew the bias tape on the inside seam.
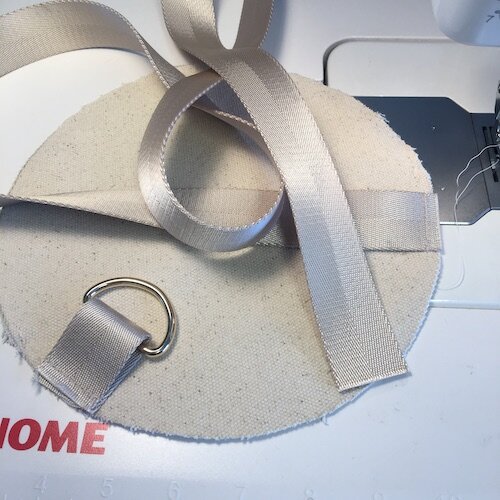
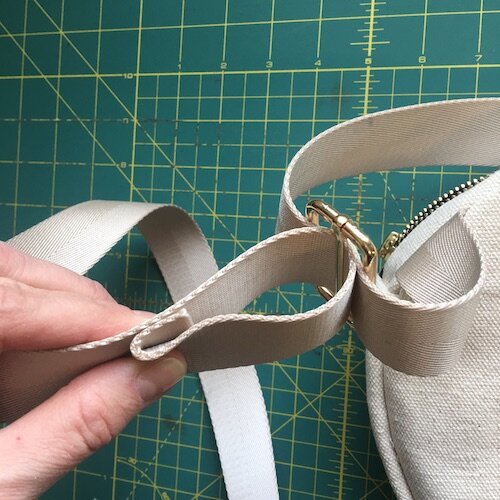
Feed the webbing through the slide adjuster, feed the webbing through the oval ring of the Lobster Clasp and then feed the webbing through the slide adjuster under the existing webbing.
Stitch the end of the webbing to the underside of the existing webbing.

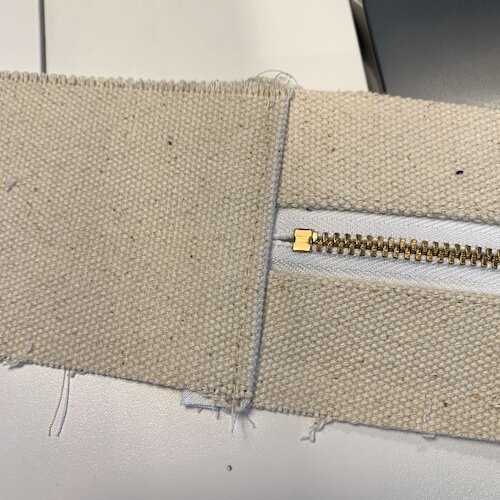
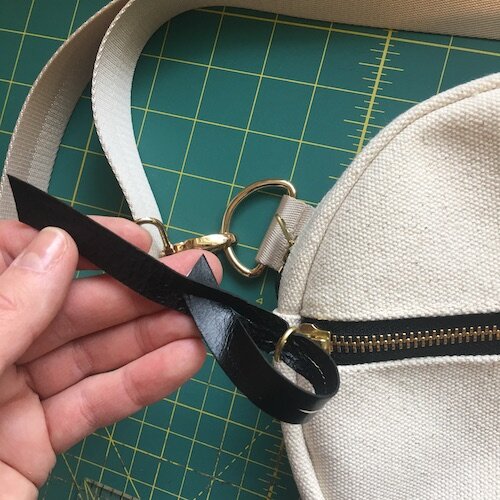
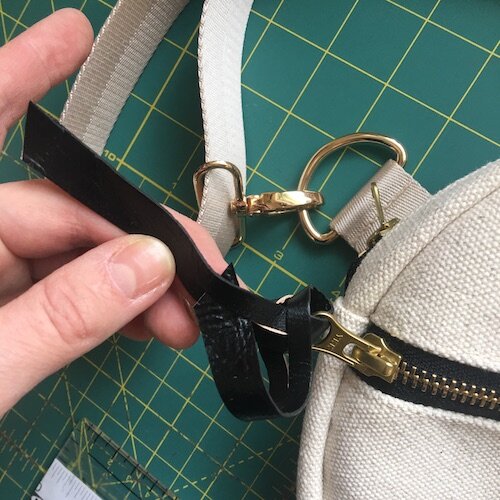
Make two slots in both stripes of leather. Set in the stripes of leather in the zipper as shown in the picture.

And now the bag is ready! Enjoy!

Circle Fanny Pack
Hope my instructions were helpfull but let me know if something is unclear. This tutorial is free and you can sew and sell your stuff.
I would love to see what you make so you can use my hashtag #tinnberry when you post your pictures on Instagram.